Tag Archives: meat

A Delicious Creation with #GourmetCreations

So we have given up wheat recently but at the same time we are not a family that can really live on salads (well, I could but NerdDad would starve to death;). So I am exploring some other options for delicious meals that will please and this dish was a huge hit!
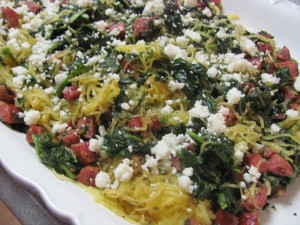
Looks delish eh? I am having a hard time coming up with a name so please, give me your suggestions!!!

Ingredients:

1 Spaghetti Squash
1 package of Hillshire Farm Gourmet Creations Sausage in Beef and Bacon
1 package chopped frozen spinach: thawed and drained
1/2 stick of butter
2 heaping teaspoons of minced garlic
2 teaspoons sea salt +extra for squash
1 teaspoon pepper +extra for squash
1/2 teaspoon paprika +extra for squash
Sprinkling of queso fresco
Olive Oil or Veg Oil

Cooked Spaghetti Squash

Process:

Preheat the oven to 375 degrees. Cut the spaghetti squash in half and scoop out the seeds.  Sprinkle the inside of the squash generously with sea salt, paprika, pepper and oil. Give it a rub to make sure the inside is all covered. Place cut side up on a cookie sheet and bake for 30-40 minutes until it is tender.  When it is done just us a fork to pull the flesh from the skin and it will shred like spaghetti!

Take your Hillshire Farm Gourmet Creations Sausage and cut it in half length wise both ways to create 4 equal sticks. Do this to all 4 sausages and then dice. Melt a 1/2 stick of butter in a skillet. Once melted toss in your sausage, garlic and all your seasonings. Once the sausage browns up and you can smell the garlic just toss in your thawed and drained spinach and heat the spinach through. Then just toss it all with your spaghetti squash and serve!

Now this is strongly seasoned  so you can back off the pepper and paprika  but my kids all love it! This served my family of 6 (with kids 10-4) with no leftovers but no one was hungry either!

So what should I call it?

Want to see the shopping trip that got me to the kitchen? Pop over to Google + to see the trip!

(This shop has been compensated as part of a social shopper insights study for Collective Bias. But while they gave me the subject, all words and recipes are mine!)

Bacon Wrapped Tri Tip & Roast Potatoes

Did you know that Smart & Final has their own meat line? I didn’t until I received the opportunity to create recipe utilizing the Cattleman’s Finest meat in the Grill Up Your Summer contest!! Let me take this opportunity to ask/beg you to pop over to the Grill Up Your Summer contest and vote for my recipe!!! Now back to the blog post;).


I was perusing their meat case and saw a beautiful trip tip that was just begging for some bacon! So here is my super, super easy and flavorful Bacon Wrapped Tri Tip with Roasted Potatoes! This is a great grilling or oven recipe!!! I have a metal sheet pan that I put on the area that doesn’t have an active burner. That way I can cut up my potatoes for roasting. But you could just slap the meat right on the grate on the side that is turned off. It gets so hot here I like to cook passively on my BBQ a lot so it doesn’t heat up the house!

There aren’t a lot of firm measurements to this recipe. Some of the lack of measurement is about seasoning to taste and some is about growing a recipe to feed your crowd. I made 2 tri tips  in these pictures and use about 2 lbs of red potatoes.

Ingredients:
Pappy’s Seasoning: Low Salt
1 Cattlemen’s Finest Tri Tip
6 oz Bacon Strips
Red Potatoes
Olive Oil

Process:
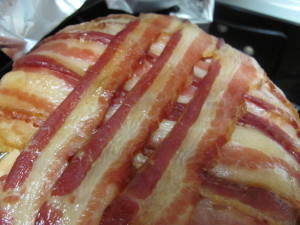
This is so simple but the crowd will go crazy! Generously rub Pappy’s seasoning all over the tri tip, don’t be skimpy! Then just wrap your bacon around the meat. Remember that regular sliced bacon has quite a bit of stretch to use it. Then tuck the very end into the previous bacon slice. It helps fight the shrinking of the bacon as it cooks.

Then cut up your potatoes. Toss them with a little olive oil and a generous amount of Pappy’s. Put the potatoes on a sheet or in a an aluminum boat. If you keep the meat on the sheet with the potatoes in the beginning the potatoes will cook in the bacon grease. Then heat your grill to 400 degrees. Put everything on the low to off side of the grill for about 45 minutes.  Let the meat rest for 5-10 minutes before you slice into them in order for the juices to redistribute.

Then enjoy!

(This project has been compensated as part of a social shopper insights study for #collectivebias. But while they may have given me the subject, all the ideas and opinions are mine!#GrillUpYourSummer)

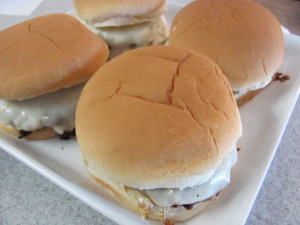
Turkey Bacon Burgers #firststreetvip

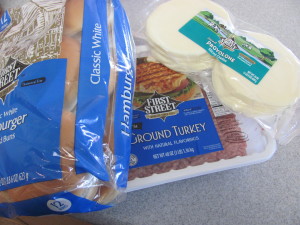
If burgers actually had a season, this would be it!!! So when I was issued the challenge to develop a recipe with Smart&Final’s First Street brand products that is where my mind went. I have done standard burgers for years but I have never made a turkey burger. Mostly because people have scared the snot out of me about how hard they are to cook because they get dry and fall apart. When I asked for recommendations on Twitter someone recommended actually adding olive oil to the turkey meat to prevent it from drying out. So I started thinking….What has fat and is delicious? Bacon of course! Instead of adding it to the top, as is standard, I basically shaved it super thin and added it into the meat! The fat of the bacon kept the burger moist and tasty!!! These were a huge hit!!!

Ingredients:

3lb ground turkey
1/2 tsp garlic salt
1 tsp garlic powder
1 tsp paprika
1 tsp parsley
6 oz shaved raw bacon
1 tsp pepper
1 tblsp dehydrated onion
1 tsp kosher salt
Buns
Provolone Cheese slices


Process:

This is super easy!!! First take your bacon out of the fridge and slice it super thin, basically shaving it. This is important because you need it to be small so that the bacon will completely cook. Then mix everything (except the buns and cheese) together. I formed the patties about the size of my hand and fairly thin. Remember that the burgers shrink and bulk up in the middle.

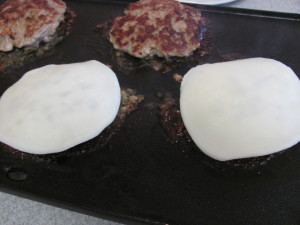
I cooked these inside on my griddle because I was afraid that they would fall apart on the BBQ but I think I would have been fine on the BBQ. So I cooked them on a griddle set on 325 degrees. I cooked it about 7 minutes on the first side. Look for the color to change about 1/2 up the patty and some yummy caramelized patches on the bottom. Then flip. Look for the color to change all the way up.

Then I feel to see if it is done. You may need to practice a little bit. But basically if I press down on the center and it is firm, then it is done. If it is squishy, let it cook a little longer. Then I put the cheese on the burger and left it on the griddle about 30 second longer. Then take it off the griddle and place it on the bun. And serve!!!

Makes 11 generous sized burgers!

Want to try some of these awesome First Street products from Smart and Final? Make sure that you stop by Smart&Final’s facebook page to enter a giveaway for a giant bag of products and a $50 gift card!!!

(I was compensated for this post from #collectivebias as part of a social shopper insights study. They provided the motivation and I provided the recipe!)

Sumac Marinated Chicken Breast

We are quickly approaching summer and it is time to start thinking about great grilling recipes. I have been doing projects for Smart & Final for a while. So when I found out what was going to be in the Smart and Final ad this week I saw a great opportunity to create a recipe!! They have Foster Farms bone in chicken breasts for only 99 cents a pound!!!

We eat a lot of chicken and I have always used a bottled marinade and I have decided that I am done buying a premade marinade (even though it is quite tasty;). I had bought some sumac to replicate a fatoush salad that I love from a local restaurant and thought maybe it might be a tasty marinade.

Based on the NerdFamily’s feedback, I was right;).

Finished Sumac Chicken w/ Zucchini and French Bread

Marinade Ingredients:

2/3 c Olive Oil
1/2 c White Wine
2 tsp Kosher Salt
2 tbl Minced Garlic
1/2 tsp Sumac
1 tsp Pepper
1/2 lemon

Process:

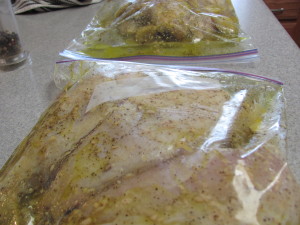
Start the marinading process the night before you plan on grilling for the best results. Mix up all the marinade ingredients in a bowl except the lemon.  Place your chicken into zip top then pour the marinade over it. Squeeze your lemon half into the bag. Then cut up the lemon half and throw it in the bag too! Seal your bag and stow it in the frig. When you go by and have a second, turn the bag! About an hour before grilling take your chicken out of the frig and put it on the counter.

Throw it onto a relatively low flame BBQ for about 8 minutes on 1 side and then another 8 on the other until the internal temperature is about 170+. Take it off the grill and let it rest a few minutes so the juices redistribute. You can put a loaf of buttered French bread on a turned off portion of the grill for about 5 minutes (I got that at Smart & Final too).

A great dinner for very little time commitment. It only took about 5 minutes to put everything to marinade and 16 minutes to cook!

(This shop has been compensated as part of a social shopper insights study for Collective Bias. They may have given me a subject but I supplied the ideas and opinions!)


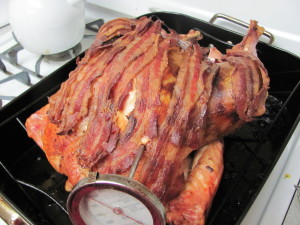
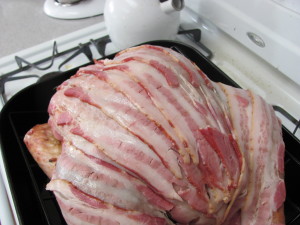
Bacon Wrapped Turkey

At Thanksgiving, I made a bacon-wrapped turkey breast and it must have left an impression with NerdDad. He requested a bacon-wrapped Turkey for Valentine’s Day dinner. So I made my first bacon-wrapped turkey. It was super easy and a huge hit!

First I rinsed the turkey inside and out (after removing the neck and giblets pack). Then I dried it with paper towels and placed it on a v-shaped roasting rack in a roasting pan. If you don’t have a v-rack, just make a snake out of aluminum foil and put your turkey on top of it!

I mixed up some Pappy’s Seasonings, minced garlic, and olive oil together in a bowl and made a paste. Then I place it under the skin on the breast, leg, and thigh meat while being careful to not tear the skin. Pour some water into the roasting pan.

Then place the turkey in a 500-degree oven for 30 minutes. Then take the turkey out and cover it in bacon! Then place a meat thermometer in the thickest part of the thigh. Then put the turkey back in the oven and turn the oven down to 350 degrees. Then continue cooking the turkey for 1 1/2 – 2 hours or until the thermometer reads 165 degrees.

Rest the turkey 15-20 minutes. Then carve and serve!

Bacon Wrapped Turkey Breast

Got your attention didn’t I;)? So 24 hours before Thanksgiving dinner we had kids with fevers so there was no going to the Mother in Law’s for Thanksgiving dinner. So I pulled a turkey breast out of the freezer and did a quick thaw. So I mixed butter, Pappy’s seasoning and parsley together in a bowl. Then I put it in between the skin and the meat. Then I just covered it in bacon. Where could I go wrong;)?

I then covered it and put it in the oven at 350 degrees for 20 minutes a pound. I then uncovered it for the last 45 minutes of cooking and the bacon finished cooking. It smelled so good!!! And it was super moist!!!! So, so good!!!

Super Easy Gnocchi Dish

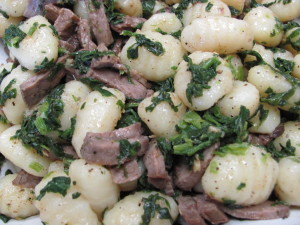
Yummy looking, right? It was super easy too! The longest thing was boiling the water!

All I did was cook 3 packages of gnocchi (hey, they are small packages and there are 6 of us;). Then I heated up 2 cups of cooked, sliced steak (I had in the freezer) and 1 package of chopped spinach (thawed and squeezed out). I melted 1 stick of butter and then sauteed 2 teaspoons of prechopped garlic. I added 1 1/2 tsp of salt, 1 tsp pepper and 1/2 tsp of paprika. Mix it together and eat up!

An added note: I often put in chopped chicken instead of steak. It really is that simple!

(This has been linked up to Works For Me Wednesday, Delicious Dishes, and Tasty Tuesday)

How I Made 5 Trays of Enchiladas in 2 Hours

I do bulk cooking but not in the once of month method. I don’t make 30 days worth of food in 2 days. Instead I take an ingredient and then make a lot with it. This time it was chicken breasts. I assembled 5 trays in less than 2 hours.

Now to be honest I didn’t cook the meat in that time. I had dump a bunch of boneless skinless chicken breasts into the crockpot and turned it on low to cook over night. Then (while I was at a baby shower) my husband gave my 6 year old a big bowl, the meat and 2 forks. She went to town and shredded it all. Then he put it into gallon bags for me.
So today I assembled all my ingredients. Enchilada sauce, tomato sauce, corn, spinach, shredded cheese, and tortillas. I thawed the spinach under hot water and squeezed all the water out. In the big metal bowl I mixed up the spinach, corn, meat, cheese, some tomato sauce and enchilada sauce. The tomato sauce keeps it from being to spicy for the kids. Then I rolled! You know the process… put sauce in the bottom of your baking pan, then dip the tortillas in sauce, then put some filling in and roll! The key is to have everything lined up and ready to go. I use up the enchilada sauce then I just grab the next can sitting on the counter.
So for those of you who think they don’t have time for bulk cooking just remember that in about 2 hours I fully assembled these, made my kids pb & j sandwiches, tended to them during lunch, washed up and changed the baby, and did all my clean up! If I can do it so can you!

(I included this post in Cooking for a Crowd at Raising Olives)