Category Archives: Crafting

Free Printables for Geeky Valentine’s Day Cards

Geeky Printable Valentines
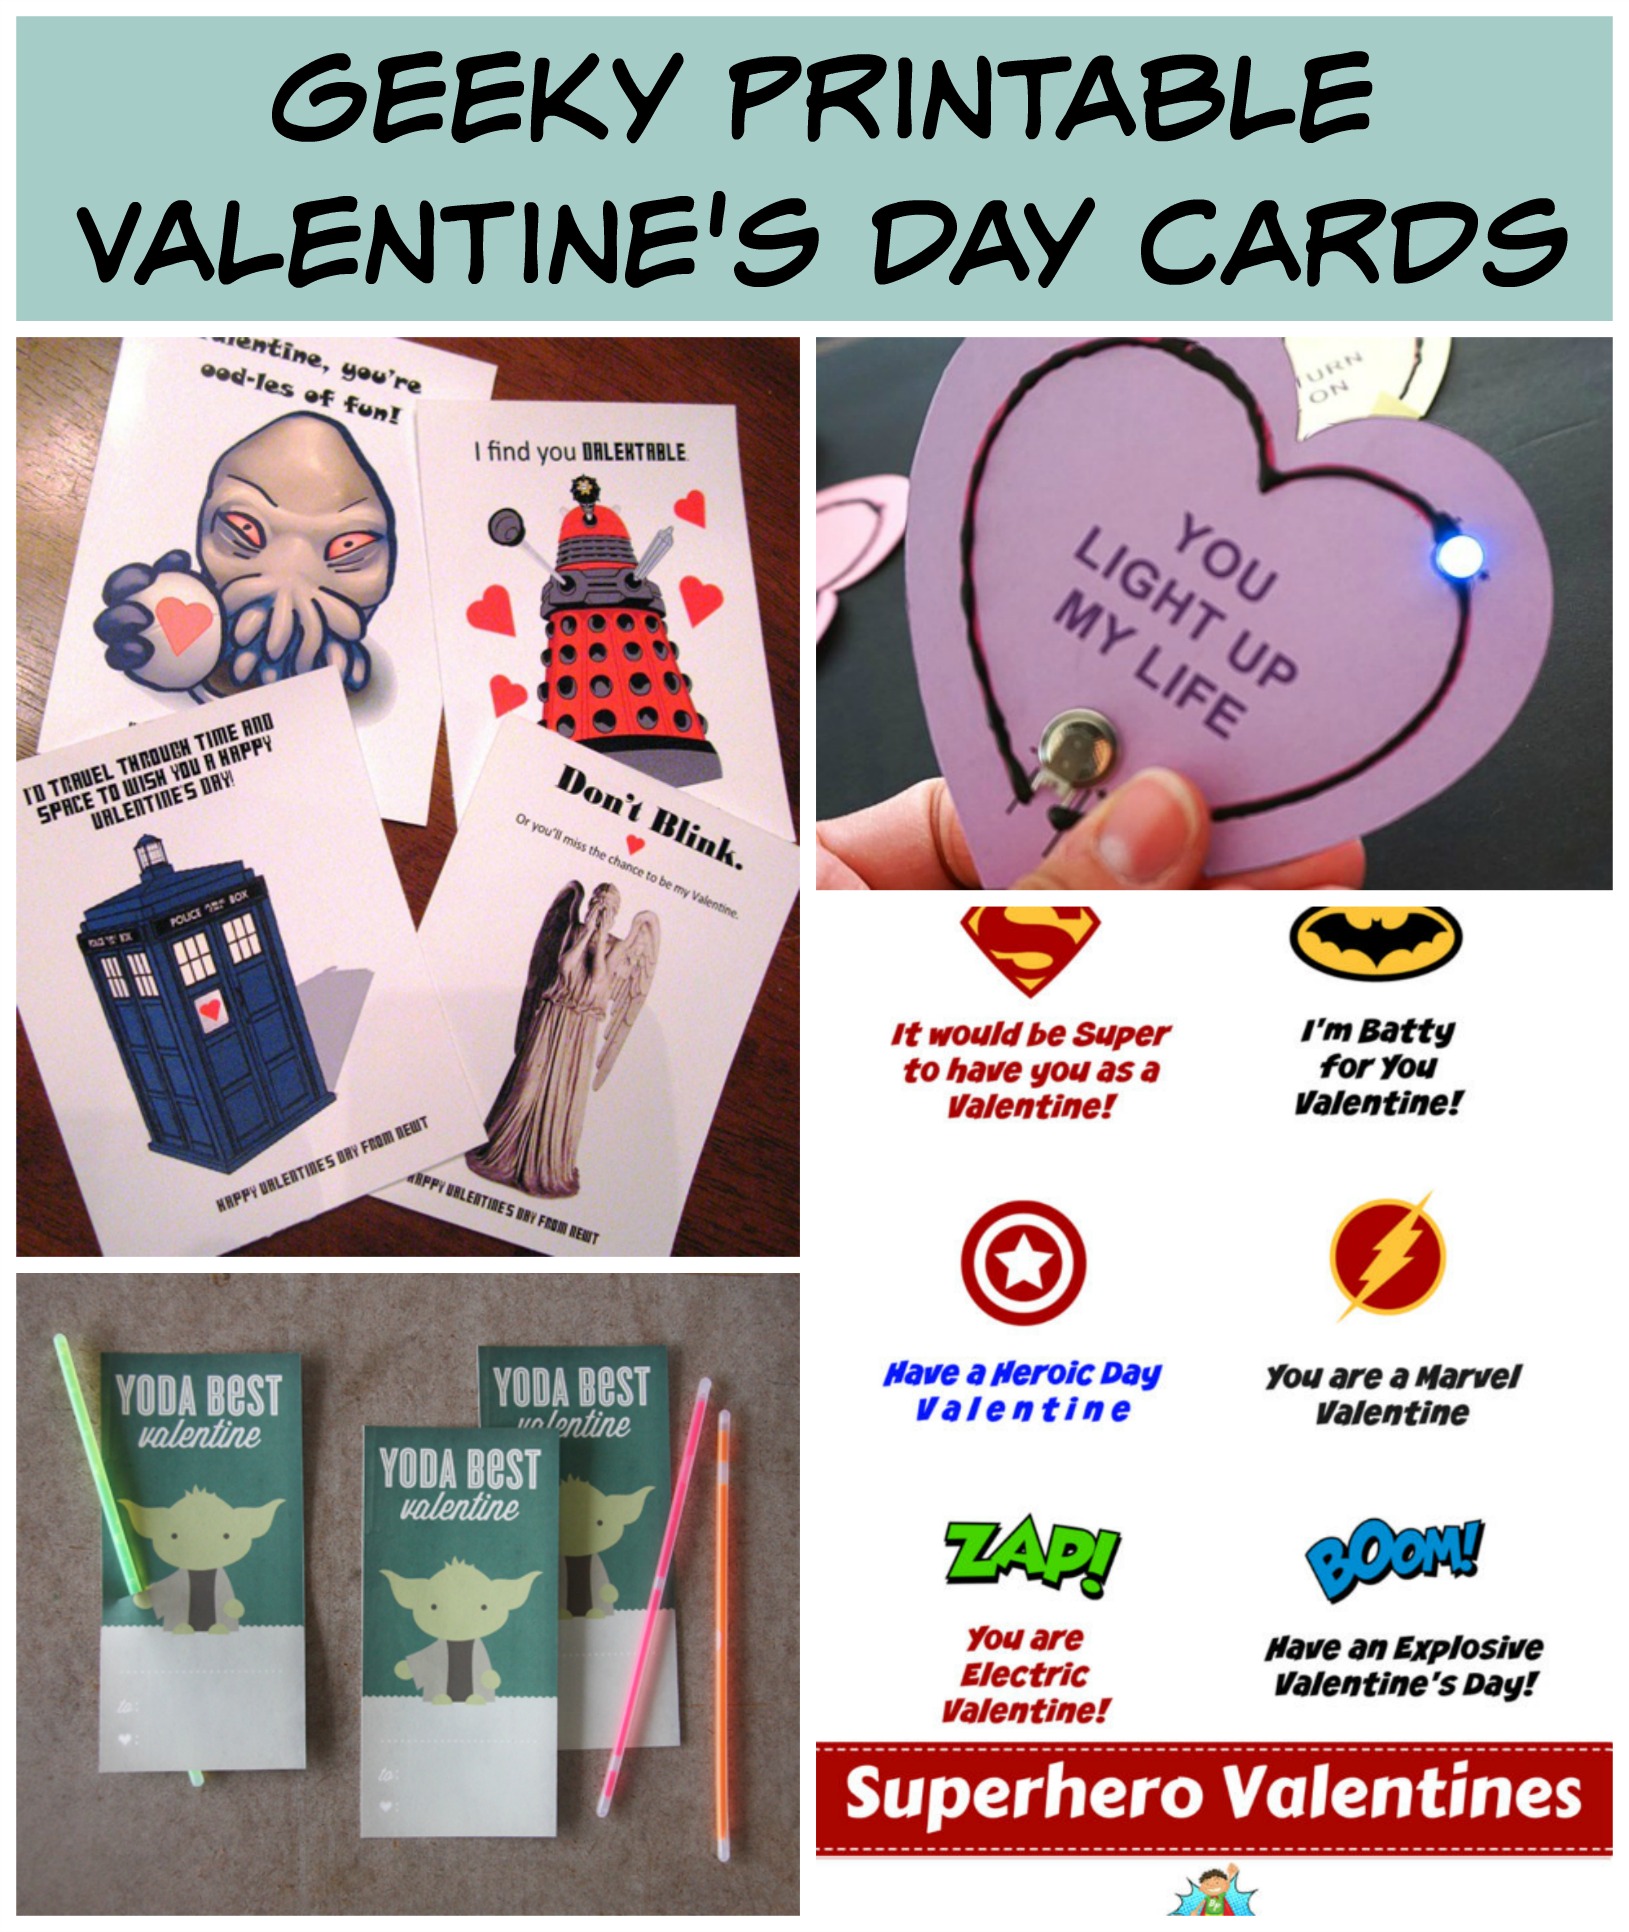
Kids go out every year looking for Valentine’s Day cards that represent their personality. But when you pop into the shops rarely do you find great geeky Valentine’s cards for the geeky kids! And when you look online they can be quite pricey. So why not print them off for free? Here are 4 geeky Valentine’s Day cards with a varying level of crafting to get them into give able shape!

First up are the straight printables!

Brain Power Boys has a collection of great “boy friendly” Valentine’s that my girls love too! They range from robots to superheros and are super cute! Just print and hand them out!

Heidi Schulz has the most adorable Doctor Who Valentine printables! They cover everything from Oods to Daleks to Angels. These are another print and go!

If you want to do just a bit more work we can pop over to a Star Wars theme! Design Wash Repeat has the coolest Yoda Best Valentine’s Day printable! They get kicked up to the next level with just the addition of a glow stick!

And if you want to go even geekier and nerdier… the coolest for last! Left Brain Craft Brain has awesome Light Up Circuit Valentine’s. While they sound complicated, they are so easy! If you can use white glue, you can make these!

Remember, even geeks can represent with their Valentines! So how are you and your kids letting your geek flag wave?

Moonlight & Mason Jars Link Up

Moonlight and Mason Jars Link Party Button

Welcome to the Moonlight & Mason Jars Link Up Party #47! I am this week’s guest host! There is always a great collection of fabulous posts in this link up and I am sure that this week will not disappoint. What ever you have been working on goes! I am looking to switch up my food & my decor so I am hoping to get into a little crafting & more cooking soon myself. My newest spring recipe is my Spring Chicken & Grits with asparagus & mushrooms. Thanks for stopping by!

Alright, are your ready to party?!

Don’t forget that we have ONE new guest host each week. If you’re a blogger and are interested in participating, please send a message on Facebook. We average about 150 link-ups per week, so that is great exposure for your blog. Don’t miss out!

MMJ Hosts Image

Wk47GHCollage3

Continue reading Moonlight & Mason Jars Link Up

Preschool and Kindergarten Valentine’s Day Crafts

prekkvalentine's

Kids like crafts! And I like kids being busy with crafts;). Valentine’s Day is the perfect time for little kid crafts because they can help create some seasonal decor and use their crafts as gifts!

The first one is a super simple heart wreath!
To prep for the kids you can take cheap paper plates and cut the center out of them. I picked up a great heart punch and had my son punch a bunch of hearts out of 2 sheets of cardstock but I could have used old magazines too! Then just place glue all over the paper plate ring and let them go crazy arranging them!!! If you want to get fancy they can draw faces on the hearts first;).

The second one is a super cute butterfly!
Take toilet paper roll and cover it in a rectangle of colored paper by placing glue on both ends of one side and then roll the paper roll in it. Then glue 2 hearts on the back for wings. You can put a hole punch in the top of the toilet paper roll in between the wings. Then have them place a colored pipe cleaner in the hole for antennae! Then just add googly eyes and draw a face! You could write to & froms on the wings and make sweet little gifts!

These aren’t complicated but they are fun!

Kid Friendly 4th of July Wreath

Kid Friendly 4th of July Wreath

This should come as no surprise but, I am not super crafty. I see all these very cute projects on Pinterest but I have not the time nor the talent to attack them. But my kids love to craft and want to spend time with me so I look for cute projects that they can so with me. I saw something similar to this in an All You magazine (last year, maybe) and I tweaked it to a project that I did with my 2 oldest kids!!!

All you need:

Wreath form (the nicer it is the less you have to cover it)
5-7 pieces of 12×12 scrapbook paper (depending on how many patterns you want)
Chip board stars
Ribbon
Glue sticks or tape runner
Hot Glue gun
Paper cutter
Ruler (optional)

4thwreathstepsProcess:
Cut the 12×12 sheets in half. Cut 1 half into 4×6 pieces and the other into 3×6 pieces. Then take 3 pieces of matching paper (both in size and pattern) and do a 1/2 inch accordion fold in each one. I give the kids a ruler and a Pampered Chef scraper to use;). You can also use a bone folder to sharpen the folds.

Take 1 piece that has been folded and fold it in half lengthwise so it looks like a fan. Glue it that way with either the glue stick or tape runner. Take 3 matching fans and glue them together to make a rosette. Do this for as many rosettes as you would like.

Wrap your wreath form in ribbon. You can cover it or do like I did so that you can see the form underneath. I didn’t have a lot of the blue ribbon so I used a second for the red and white. Do it how ever you want. I secured the ribbon with straight pins but you could also glue it onto the form.

Take your small rosettes and hot glue your stars onto the centers. You could probably do it last but I find this easier.

Start arranging your rosettes on the form. You can cover it but my kids didn’t want to make that many rosettes;). I made a point to try to randomize the colors and patterns. Then hot glue it all down. Make sure to leave your wreath flat until the glue cools!

Then my daughter wanted a bow on the wreath. So I just took the extra ribbon and tied a bow to her finger and hot glued it on.

Seriously, that is it. The only thing I specifically bought for this project was the wreath form which we can use again. Everything else is crafting extras that I had in my cabinet from various projects I was going to someday do.

And now we have a super cute wreath that the kids got to help make!!!

CVT: Bird Feeders for All Ages

Home made bird feeders are so much fun!!! And so cheap and easy. I have 3 different sets of bird feeders you can make. Choose based on the age of your child, how much you want to help and the materials you have on hand!

I have Bird Feeders Even Toddlers Can Make! All you need is Cheerios and some odds and ends. There are also Peanut Butter Bird Feeders for young students that need peanut butter and bird seed! There is even Popsicle Stick Bird Feeders that you can fill with anything!!!

These feeders make a great jumping off point for bird watching or the beginning of a bird unit!!!

(Welcome if you are coming here after seeing me on Central Valley Today! The links will take you to the various bird feeders I showed on KSEE 24 today!)

Blogging Gals Sticking Together!

Some of you out there know that I am going to my first blogging conference in July! It is the Savvy Blogging Summit and I am so excited!!! This will be my first time out of California and I am a bit nervous but looking forward to it!

It is a great group that are coming together to learn how to be better bloggers! 1 of those that are coming is Megan from the Half-Pint House. She makes some of the cutest bags and that is how she is paying her way to the conference! So go check out some of her cuteness and get something!

Simple Cards

OK, so this isn’t the most impressive craft but still. Mother’s Day is quickly approaching and we will be out of town next week. So I went to craft night and took the opportunity to get something off my todo list;). All I did was put some beautiful paper on top of a card of purple cardstock. Then I just added some cute chip board letters.

I keep running out of things like note cards and birthday cards. So I went ahead and fronted some more cards. I will add some additional decorations to them depending on the need of the time. I can just throw a birthday tag or a “just a note” chipboard on the top and personalized the inside!

Not my most impressive craft but a great tackle of something I needed to do! Have you done any fun or useful crafts lately?

(This is posted in A Soft Place to Land’s DIY and Tackle it Tuesday)

And We Have a Bow!

My Masterpiece Head On

So the NerdPie has a really pretty blue dress to wear for Easter (when she is getting baptized).  So I happened to find the perfect blue ribbon for $1 that matches the dress perfectly. I have been looking at it for a while trying to get up the guts to cut it up and make a bow out of it. So I finally did! Once I was done I realized that I had forgotten to take pictures along the way but it was pretty easy.  I made 1 bow with the 2 basic loops but instead of tying it I wrapped wire around it. Then I made another bow.  Then I set them catty corner. I took another piece of ribbon and tied a knot around  both bows! I used fray check to stop the ends from fraying. The bow was so just perfect so I just had to slip one of those cheap alligator clips from Sally’s Beauty Supply in the back. I didn’t even need glue!

It is the little things that make you feel like you accomplished something;).

Tackle It Tuesday: Birthday Cards

Years ago I had purchased a cheap package of birthday cards from Currents. Then I got into rubber stamping (a little). So I planned that when all those cards were used up I wouldn’t buy any more but make them. Well, I finally ran out of birthday cards but hadn’t gotten around to making any. I was buying them 1 at a time until I could get around it.

So here they are! They aren’t anything fancy but they are handmade. The flower and leaves are 1 stamp and the butterfly is another. I stamped them in brown on an ivory piece and then colored them in. Then I just stamped Happy Birthday inside!
I do have to say that I finally believe that these stamps can start being cost efficient!
So that is my Tackle It Tuesday!