Category Archives: crafts

Collage Memo Center

If you are looking for a gift or are just setting up your communications center for the year this collage memo center is a win! Even though we all have planners my kids absolutely having this hanging on the wall. In addition to any appointments, you can put chores and your meal plan on this board along with who is cooking it! Having it all laid out on the wall means you are equipping your children be more successful and maybe not ask you what you are having for dinner.
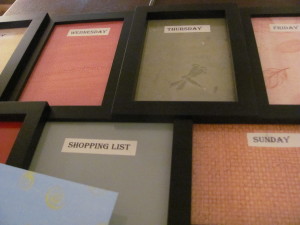
Ok, I have seen this in a variety of places and can’t remember the first one but… I love the idea of this custom made dry erase memo center!!! Why does this work? Glass is a perfect dry erase material!!! First, you get a cheap collage picture frame (mine was $6 from Walmart).  I also got out my paper cutter, tape runner and scrap book paper collection (which is way too big;).  This collage is 9 holes so I can do more than just the days of the week!

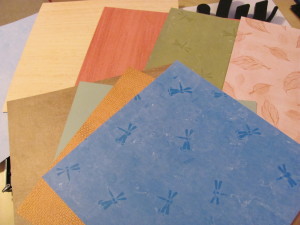
Then you actually need to pick out the papers that you are going to use in each frame. For me, this is the most time-consuming part. But look at the upside, Out of 1 set of papers you can make multiple boards so you just have to choose once;). I went with a fairly gender neutral set here.

Then cut your paper down to fit each frame. 8 of my frames were 4 x 6. So I cut my 12 x 12 in half then each half into thirds. Then label each frame so you know what goes there! I did the 7 days of the week, notes, and shopping list. You could use stamps, letter cutouts or just print the labels on paper. I just used this template for my Memo Board Labels then cut them out and used a tape runner to fix them to the paper!

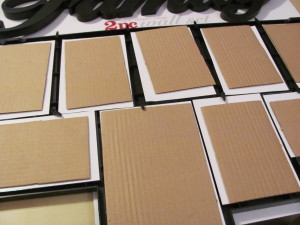
Then take off the back and prepare to assemble. This is the time to clean your glass!!! Nothing is more annoying than to finish and realize that you have marks on the inside of the glass;). To assemble just put your paper into the frame like a picture. That is really it;).

You can also go the extra mile…. Put a piece of velcro on the side of the frame (where no one can really see) and the dry erase pen too!

Not only is this great to make for yourself but it is a fabulous gift! I mean, how much is a custom memo board worth?
Free Printables for Geeky Valentine’s Day Cards

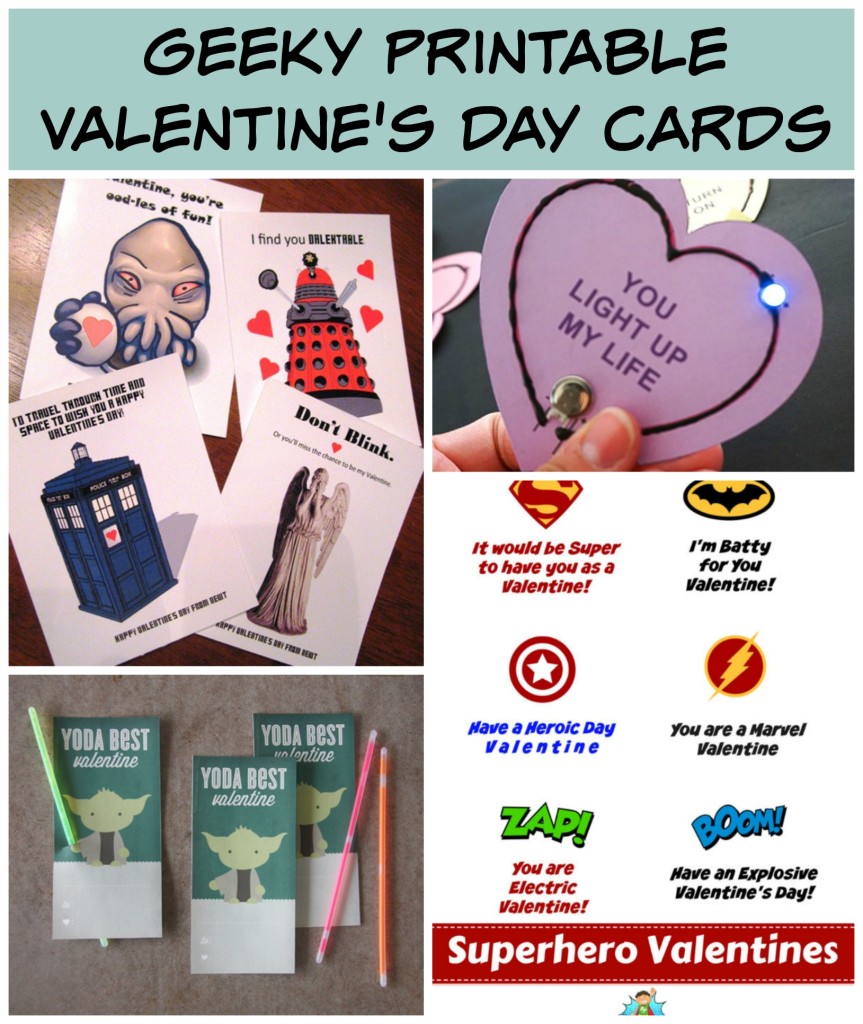
Geeky Printable Valentines
Kids go out every year looking for Valentine’s Day cards that represent their personality. But when you pop into the shops rarely do you find great geeky Valentine’s cards for the geeky kids! And when you look online they can be quite pricey. So why not print them off for free? Here are 4 geeky Valentine’s Day cards with a varying level of crafting to get them into give able shape!

First up are the straight printables!

Brain Power Boys has a collection of great “boy friendly” Valentine’s that my girls love too! They range from robots to superheros and are super cute! Just print and hand them out!

Heidi Schulz has the most adorable Doctor Who Valentine printables! They cover everything from Oods to Daleks to Angels. These are another print and go!

If you want to do just a bit more work we can pop over to a Star Wars theme! Design Wash Repeat has the coolest Yoda Best Valentine’s Day printable! They get kicked up to the next level with just the addition of a glow stick!

And if you want to go even geekier and nerdier… the coolest for last! Left Brain Craft Brain has awesome Light Up Circuit Valentine’s. While they sound complicated, they are so easy! If you can use white glue, you can make these!

Remember, even geeks can represent with their Valentines! So how are you and your kids letting your geek flag wave?

T Shirt Infinity Scarf

I have been seeing t shirt scarves all over Pinterest and every where else! There are so many different varieties so I decided to give it a whirl myself.

All I needed was a cheap, stretchy t shirt and a pair of scissors. I got a cheap, stretchy turtle neck on clearance at Walmart (get the biggest one you can, more material).

First thing, cut off the bottom seam. Then you cut of a measure off between the arm pit and the bottom just however wide you want your scarf. I like a thicker scarf and so I am getting at least 2 out of this 3x shirt. Then stretch! I handed one side to my 9 year old and we pulled and pulled;). The edges will curve in and basically cover the rough edge, the more you wear it the less you will see it.

That is it…. A scarf… It is a great way to get a custom scarf to match something in your wardrobe or just to use up those extras shirts hanging around! It is a nice, cheap, no-sew gift!!!!

It is so easy that I feel a little silly writing about it;).

Kids’ Christmas Crafts

The NerdFamily Kids got their Christmas craft on over the weekend! They were all really fun and pretty easy! I will do a quick walk through of each one along with materials sourcing!

Snow Flake Wreath:

I bought a whole bin of foam snow flakes from Michaels years ago. So I have 10 million snow flakes and this is a great use! All this wreath is composed of is snow flakes, white glue and ribbon. Just take a stack of snow flakes (I recommend alternating fat and thin ones) and glue them up and under in a circle. Then we just put a ribbon through it! You could do a few and hang them in your front window. Very pretty!


Craft Stick Stars/Snow Flakes:

Depending on which kid you ask this is either a star or a snow flake;). It is just 4 thin craft sticks that came colored (I picked them up on clearance at Michaels). Just glue them on top of each other going different directions. Being the nerd I am, we do perpendicular first then 2 45 degrees;). I recommend after each level you apply pressure for a 5 count to help it grab. Then you can put little fuzzy pom poms on the ends if you want. You could also do jewels or glitter. I picked up the pom poms at Joanns.

Poinsettias:

I totally stole this version of the construction paper poinsettia from All Kids Network, including the petal/leaf template;). Construction Paper from the Dollar Tree.

Gingerbread Men:

I found these gingerbread forms at Target in the dollar bins for, you guessed it, a dollar;). I got 10 in the pack so there will be more gingerbread person making around here;). I had little foam pieces left over from the kids’ foam gingerbread house kits. But there were also googlie eyes in the dollar bin at Target. We took a cotton ball and pulled it apart to make the white hair and they drew on them with markers. Anything goes! For the record, the bald one is a cop. The little colored in gingerbread man on his chest is his badge;).

Do you craft with your kids for Christmas? What are their favorites?


Smart Strategies: Kids Crafting for the Novice


Ok, I am not the fun crafting mom. But I have kids and I want them to be creative and have a fun life but with as little mess and chaos as possible!!!

And if it is the holidays and you are having kids visit you need to have a plan! Kids love to craft and it will keep them happy! When they are done they will even admire their own creation for a while. To this end I have a few tips, just in case you feel like me;).

Tips to Successful Crafting with Kids:
-#1 Tip: Plastic place mats!!!! I don’t care if you have the kids working on a plastic table cloth or outside, always use a plastic place mat. Why? There is some basic convienience to start with. If they beads or some little thing they can just pick up the place mat and dump it into a bowl. But if things get messier, say glue or paint, do you want to have to scrub a table cloth or just put a place mat into the sink and rinse it off? Exactly, place mat it is!!!

-Gather supplies together before you start. Nothing is worse than 2 minutes in the kids calling you saying how they need more stuff. Except not knowing where it is at and everyone waiting as you dig around looking for it.

-Prep the kids! Take a second before the crafting starts to evaluate if the kids should change their clothes, roll up their sleeves, pull the hair back or don an apron. It takes 2 seconds but can save hours of trying to get glue out hair or marker off of shirt cuffs.

-Stay close! I know the goal is to get them fairly independent but that doesn’t mean you are off the hook. Stay close to answer questions, give direction or bail them out of a messy situation before they get glue on the carpet!

There are key things to have on hand. This is a great refresher for those who are just having kids visit and need to shop.:
White Glue
Kids Scissors
Pipe Cleaners
Fuzzy Balls
Craft Sticks
Construction Paper
Magnets
Colored Pens
Cheap paper plates (for organizing and cutting up)

Free Homemade Gift Ebook

The Happy Housewife (better known as Toni;) has compiled a great ebook with 60 Homemade Christmas Gifts that is free right now!

These are great gifts from a variety of bloggers. They don’t even look homemade (always my struggle;).

I think I might make the cake plate or the etched vase or the tea cup candles….

Go grab it while it is free and you have time to make a few gifts;).

(And yes, there are affiliate links;)

Free Building and Crafting Workshops

Home Depot has a monthly building clinic on the first Saturday of the month from 9am-12pm. It is completely free. The kids get to use Home Depot’s tools to build a project. In addition to the project the children also receive an apron, a commemorative pen and a certificate of achievement. It doesn’t look like you need to register for it.
Lowes has building clinics a couple of weekends a month. On the weekends there are clinics you have your choice of Saturday at 10 am or Sunday at 2pm the weekends they are doing them. They get an apron, goggles, a patch, and this month they are building wooden projects on the weekends of 6/9 and 6/23. Must register online

Michaels has a variety of craft events. Some are adult only and some are for children. Also some are totally free and some require the purchase of 1 of the supplies. For example they have decorated mugs where you purchase the mug and sometimes it is just free. They are also offering paid craft classes like Wilton cake decorating for 8-12 year olds for $15. The schedule is up for June but the next month isn’t always posted until the month has began.

These are year round deals but are especially great for summer fun!!!

Popsicle Stick Bird Feeder

This is the perfect bird feeder for your kids to make! Kids that are probably 2nd grade and up can make it on their own with just a little instruction. This is my favorite bird feeder because you can put what ever you want in it. This one will be holding some stale hamburger buns after I am done with my tv spot;).


Do you remember when you were a kid and you would save us your used Popsicle sticks? Gross… It is so much easier to buy them on sale from Walmart or Michaels;). First, build your base. As one of my kids said, they build a fence piece.  I have them lay down one Popsicle stick as a guide post to figure out how many sticks to lay out. Then glue on 2 supports. We just use regular white glue to afix everything. Then from there glue 2 more sticks going the opposite way, keep going until the desired height.

Before you add your last to sticks you need to take a second to add your hanging string. Tie the string to each of the last two sticks. When you glue down that sticks make sure the knots are on the inside of the joints and are on opposite corners.

Let everything dry before you pick it up. White glue will definitely hold everything well but until it is dry everything is still squishy. Then hang it out and fill it for the birds!!!!

Peanut Butter Birdfeeders

A Toilet Paper Roll and Pine Cone Birdfeeder

I love bird feeders because I love birds! When I was a kid we used to hang bird feeders outside the bathroom window so we could listen to them when my mom was getting ready in the morning. We also hung them outside the back door and I would watch the birds when I needed to take a break from homework;). And my kids love them too! So making bird feeders is a must in our house!!!

This is a super easy bird feeder that young elementary school kids can make with practically no supervision! It is easy and I made these when I was a Brownie. But I have changed it from how I did it as a kid. Changed it just enough to make it easier;).

Both of these use peanut butter as a glue to adhere the bird seed. I remember trying to spread peanut butter on a toilet paper roll as a kid and getting super frustrated! So I solved the problem! Put some peanut butter in a bowl and then add a little vegetable oil. Mix! This will thin out the peanut butter and make it workable. Just don’t thin it too much or you will just be spreading oil onto your stuff;).

With the toilet paper roll feeder there are just a couple of steps! First, punch holes across from each other. Then tie twine, butcher’s string, or fishing line to both holes. Slather the toilet paper holder with your thinned peanut butter. Then roll the toilet paper roll in a bowl you have filled with birdseed. Make sure you press firmly! And that is it! Just hang and watch the birds feast.

The pine cone feeder is basically the same deal. Slather your pine cone in the thinned peanut butter and roll! Then ties a string on it! My daughter did one where she added shaped green pipe cleaners to make it look like a fruit;).

Seriously, that is all it takes for super cute, cheap and easy peanut butter based bird feeders!!!!